
We use the Microsoft Visual Studio .NET IDE (Interactive Development Environment) for creating and running the C++ programs for this course. Note: You may also have the Microsoft Visual C++ 6.0 environment on your PC, but we will not be using that.
To begin, select the New command from the File menu. In the cascading menu that appears to the right, select Project. This will bring up the New Project dialog:
Select Win32 from the Project Types list on the left, and Win32 Console Project from the Templates list on the right.
Enter a name for your project, replacing the <Enter name> text that appears by default. The name you enter is used as a directory that will contain your project's files.
Note: Visual Studio by default prompts you to put project files under My Documents\Visual Studio Projects\<Enter_name>. This is a reasonable default, but you may want to consider using something like My Documents\Labs\cs1030 as an alternative.
Suppose you enter Test as a project name; after you press the OK button on the New Project dialog, the following dialog appears:

Don't press the Finish button just yet!
First, select Application Settings (in the blue section at the left of the dialog). The appearance of the dialog changes to
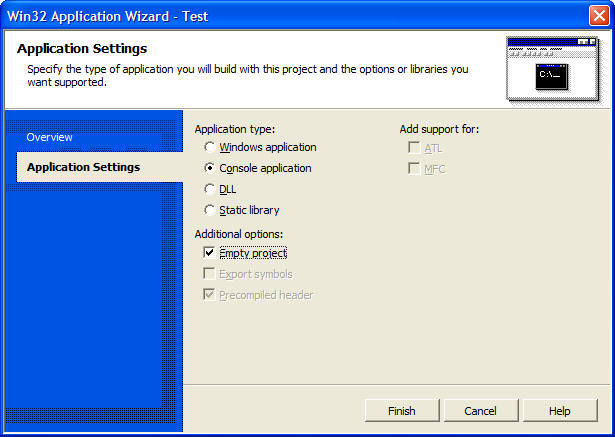
Select Empty Project as shown above; then press Finish. You'll now have a project called Test appear in the VS Solution Explorer (at right, below).
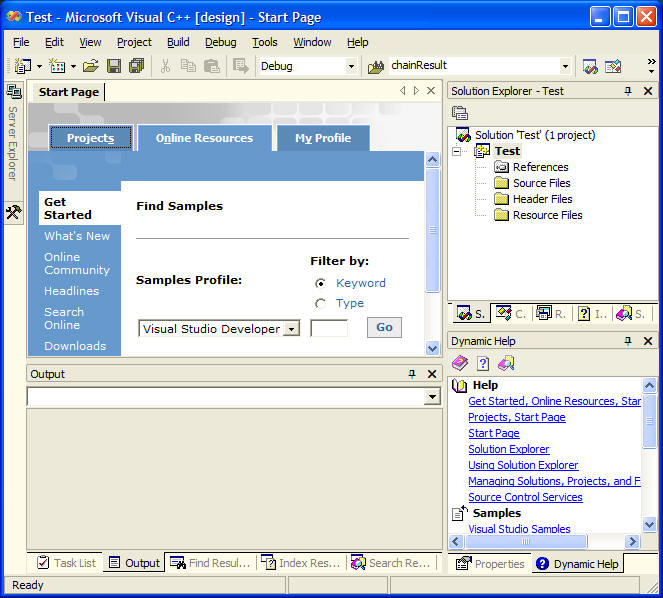
Select Source Files from the hierarchy displayed under Test in the Solution Explorer. Right-click and select Add New Item from the cascading menu. The following dialog appears:
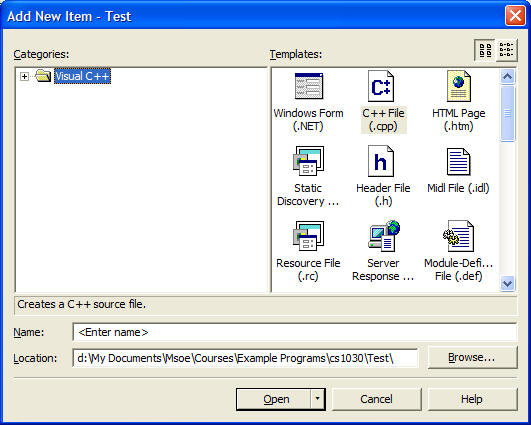
Select C++ File from the Templates list, as shown above. In the text field below, enter the name of the file that will contain your C++ source statements. The name you enter for the file can be anything you choose; for example: MyApp.cpp. When you press Open, a blank .cpp file with the name you supplied will be added to the project. This is the file that will contain your C++ program statements.
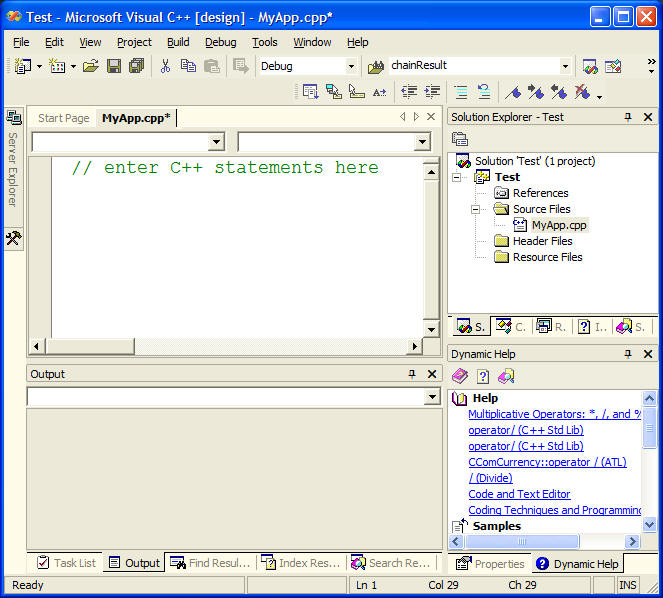
Unlike Eclipse, Visual Studio does not indicate syntax errors as you type in your C++ program. Instead, you have to explicitly invoke the C++ Compiler and Linker in order to build the resulting executable file that will be your runnable program. To do this, select the Build Solution command from the Build menu after you are done typing in your program.
If your program contains errors, the Compiler will generate a list of error messages and place them in the Output pane. You'll have to correct any errors before the build process will complete successfully. You will know when the build is successful from the messages output to the Output pane.
Once you have successfully built a runnable program, you run it by selecting the Start Without Debugging command from the Debug menu. When your program runs, a separate console window will be created where your program's output will appear. Note this is different from Eclipse, where program output is placed in a Console pane within the development environment.