This page contains instructions for installing and configuring the Eclipse
J2EE web application development environment.
Updated 1/2014 for Eclipse Kepler and Tomcat 6.0.39.
In this course, you'll be creating web applications within a J2EE version of the Eclipse development environment.
You likely have the "standard" edition of Eclipse already installed on your laptop, which is referred to as the J2SE ("SE" for Standard Edition). For web application development, you need the J2EE (Enterprise Edition) of Eclipse. You can have multiple releases of Eclipse installed on your laptop, provided you use different file directories for the various installations. The J2EE edition of Eclipse tend to startup more slowly due to the larger number of features - so you may want to keep your J2SE edition of Eclipse around for non-web development.
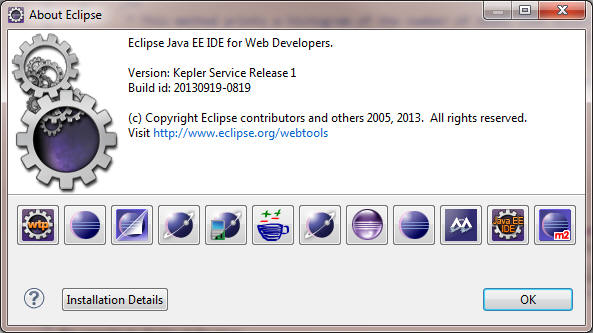
To get the J2EE edition of Eclipse (the latest at the time of this writing is the Kepler release), follow this link to the Eclipse IDE for Java EE Developers website, and select the appropriate download (the Windows 64-bit version for running on Windows 7). When installed and run, the "About Eclipse" dialog should look something like this:
Tomcat is a Container for Java-based web applications. You need to install Tomcat on your laptop in order to test/execute the Java-based web applications you'll be developing in this course.
Tomcat is the Apache Software Foundation's implementation of Sun's Java Servlet and JavaServer Pages Container specifications. There are other competing implementations (Apache Geronimo, Red Hat JBoss, Oracle WebLogic, IBM WebSphere, etc) that add certain features beyond the basic specifications (which we won't need for this course). Tomcat typically runs alongside an Apache HTTP Server, but it is fully capable of running as a standalone web server for small web applications, so you'll only need to install Tomcat on your laptop. Eventually, however, you'll be deploying your applications to a remote server running Tomcat under Apache.
The current version of Tomcat at the time of this writing was 8.0.0 (released December 2013), but the textbook is based on Tomcat 6.x, which has been around for years and is still on many MSOE servers. There are some differences between Tomcat 6 and Tomcat 7 (and 8) that affect application development: For subsequent lab assignments, you will be deploying to a remote server running Tomcat 6 using JRE 6.0, so you'll need to be sure to download and install Tomcat 6, and configure the Eclipse workspace to use Tomcat 6 and JDK 6.0.
We will be using both Tomcat 6 and Tomcat 7 in this course, so you must install both. You may also install Tomcat 8, but be aware that it requires at least Java SE 7.0, so you may have to update your Java environment if you want to use Tomcat 8.
To get Tomcat 6, select and download the 64-bit Windows zip (pgp, md5) package from the Apache Tomcat website. (Note: This link is to the 64-bit distribution of Tomcat 6.0.37 for installation on the 64-bit version of Windows 7. There are other distributions available, but you should use the one in the provided link unless you really know what you are doing.)
Once downloaded, extract the files into a WRITEABLE file directory on your laptop - for example: C:\Apache\apache-tomcat-6.0.37-windows-x64. Note: If you're using Windows 7, it is recommended that you avoid installing Tomcat to a system folder such as C:\Program Files, since you'll have to modify the security permissions to allow write-access to files and subfolders in that directory. Make a note of this location; you'll need it when configuring Eclipse (below).
In order to execute and test the Java Servlets and JSPs you'll be developing, you'll need to configure Eclipse to use a Tomcat servlet container.
1. From the Window menu of Eclipse, select Preferences. In the Preferences dialog, expand Server and then select Runtime Environments (Note: the following dialog shows an existing Tomcat 6.0 runtime environment that already existed on my system - you will likely not see any existing runtime environments when this dialog first appears).
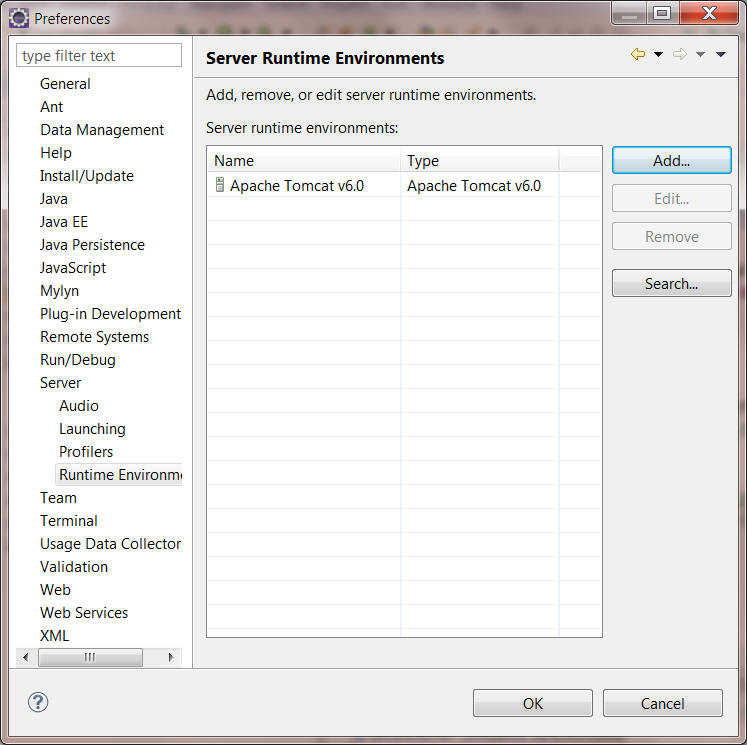
2. On the Server Runtime Environments page, click Add. The New Server Runtime Environment wizard opens:
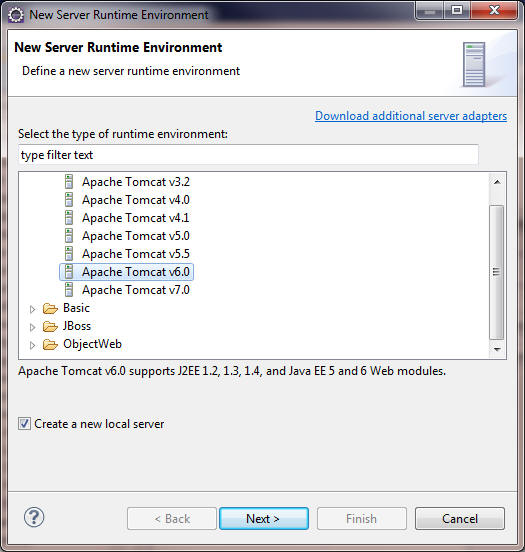
3. Make sure the Create a new local server checkbox is checked as shown above. Then, select Apache Tomcat v6.0, and click Next. The following dialog appears:
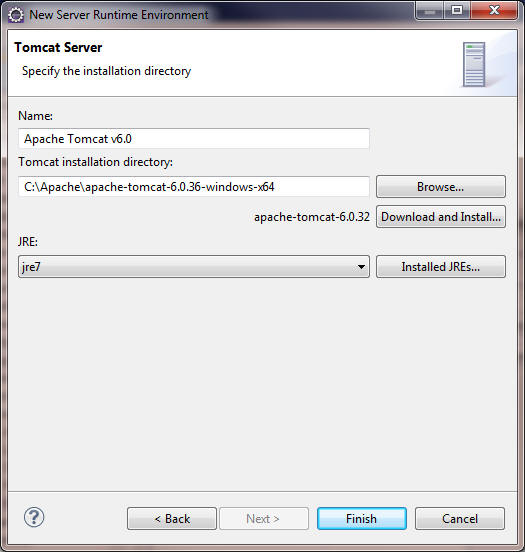
4. In the Tomcat installation directory text box, fill in the location of your Tomcat installation.
5.
For the JRE, the default selection is Workbench default JRE. You can also
explicitly select a particular JRE or JDK, provided you have others installed on
your computer. If you select Workbench default JRE, you must make sure
your Eclipse workbench is configured for at least JRE (or JDK) 6.
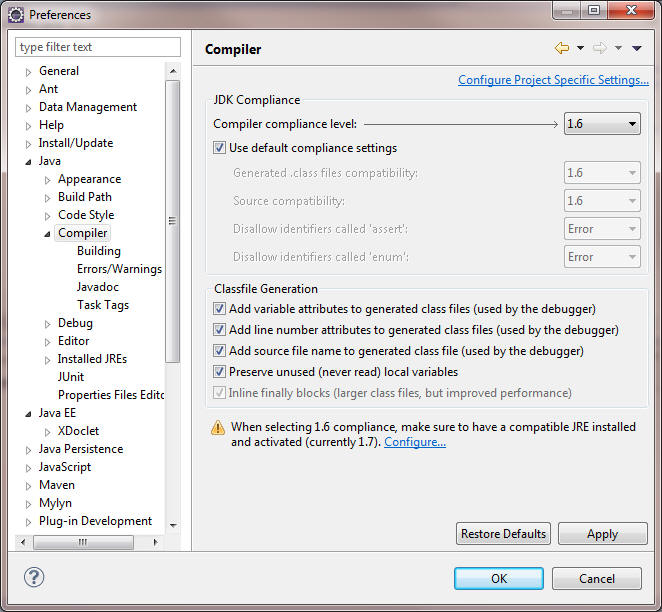
6. After pressing Finish, you'll return to the Preferences dialog. Expand Java and then select Compiler. As shown below, set the Compiler compliance level to 1.6 - you need this in order to ensure your resulting applications will deploy and run in Tomcat 6 environments using JRE 6.
Note: You can find most of these same instructions for creating a Tomcat server within the Eclipse Help pages by searching for "tomcat".
A final note: at some point, you may find yourself trying to run a Tomcat7/jre7 application on Tomcat6. You may encounter an error containing the message "unsupported major/minor version 51.0". The major/minor The version numbers in the error message corresponding to jre version numbers are as follows:
J2SE 8 = 52,
J2SE 7 = 51,
J2SE 6.0 = 50,
J2SE 5.0 = 49,
JDK 1.4 = 48,
JDK 1.3 = 47,
JDK 1.2 = 46,
JDK 1.1 = 45